Installing Standing Seam Metal Roof
Metal roofs are great because they last a long time, are low maintenance, and hold up well in high winds. There are many options when it comes to metal roofing. You can get traditional corrugated metal roofing or standing seam metal roofing. The difference is standing seam roofs don't have any exposed screws going through the metal - in other words, you don't have to worry so much about leaks down the road. Standing seam roofs are a little more expense but not much considering the long-term advantages. This webpage will guide you through the steps of installing a standing seam metal roof.
Installing a prefab 2 car metal garage is also a good way to protect your car or to add more working space to your property.
Standing Seam Roof
Corrugated Metal Roof
Corrugated metal roofing uses screws with rubber washers to seal the holes made through the metal but after 10-15 yrs of exposure to the elements and UV light, these often breakdown and then you you end up on your roof every year with a tube of silicon trying to seal up all the screws. I've seen this on old farm houses where I grew up.
Cost of Standing Seam Metal Roof
We purchased our seamless roofing from Harrington and Company in Salt Lake who sells "Fabral" metaling roofing. See Fabral.com for their complete product offerings. There are tons of different colors and options available. Some are energy star certified and allow you to get a tax credit of up to $1500 (30% of material costs).
To get an estimate on current metal roofing prices EcoWatch is a good resource.
The price of metal is constantly changing but when we purchased our metal roof it cost us $4,750 for all of the materials (metal sheets cut to length, drip edge, facia, soffit, pan-head screws, and delivery).
A 26' standing seam sheet that covers 16" in width was $45. This worked out to $1.32 per sq foot for the metal roofing.
Cost of installing standing seam metal roof: $0 - that's why you're reading this website:)
Standing Seam Metal Roofing Installation Guide
Estimating and Ordering
Sketch a birds-eye view of the roof and label each section (see example below)
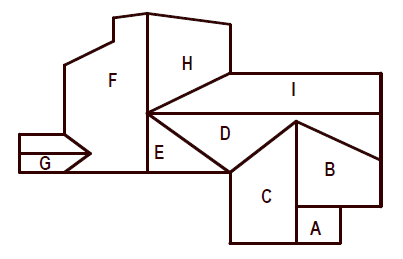
Sketch a diagram of each roof section. Show all measurements (see example below). It is important to measure the exact center of the ridge to the eave edge. Do not allow anything for overhang.
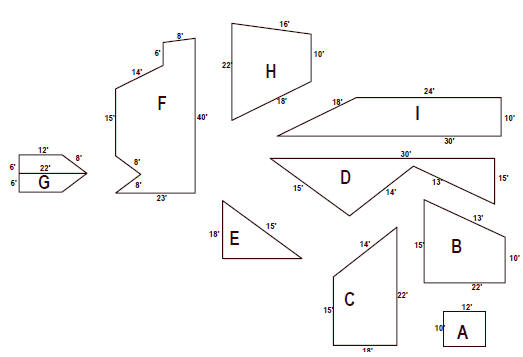
With each roof section diagramed, you can determine length and number of panels needed. A typical standing seam panel is 16" wide so you divide your total width by 1.33'(16") to get the number of sheets you need. Hips and valleys in your roof must be accounted for. Those angles can be cut on site but you need to make sure you have plenty of length.
New Roof Application
The next step to installing your standing seam metal roof is to prepare the roof surface. Make sure there are no nails or other objects protruding from the substrate that might puncture the underlayment or damage the roof panels. Clean all debris from the deck.
Check all details for possible roof penetrations which must be added to the deck prior to roof panel installation (vented ridge for example).
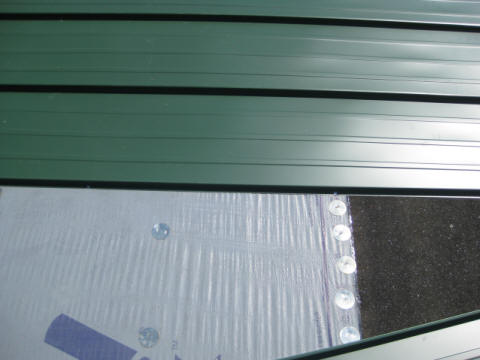
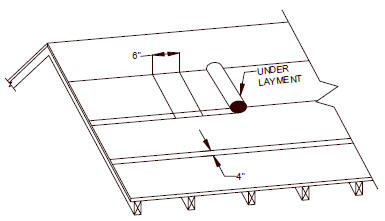
Cover the entire roof deck with 30-pound felt paper, or Titanium
Underlayment (hereinafter referred to as
underlayment). Begin at the eave at the gable end and roll out the
underlayment horizontally (parallel to the
eave). Allow each consecutive course to overlap the previous one by
4-6”. Overlap the end a minimum of 6”
when starting a new roll of underlayment. Areas of underlayment that
have been torn or cut should be
replaced or repaired prior to installation of the metal roof. (See
Illustration below) Ice & Water shield
should be used in cold climates starting at the eave and extending
at least 24” past exterior walls.
Panel Installation
Note: Prior to standing seam panel installation, determine which items need to
be installed prior to panels (such as vent screen, eave,
valley, swept wing, etc.)
1. Install eave trim (aka drip edge)
2. Working off the eave edge, establish a straight line up the gable
edge from which you are starting. This will
insure that the first panel laid will be straight and square with
the eave.
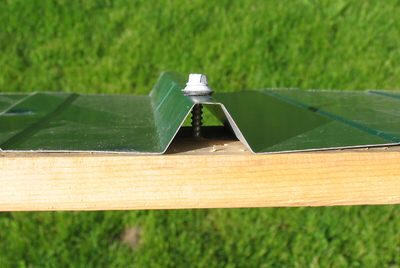
3. Before fastening the panel to the roof deck, hem 1” of the panel
180deg. (or allow a 1” overhang to attach an
angle piece to the eave).
4. Once the first panel is in proper position, secure it to the roof
deck with the proper fasteners along the screw
flange (#10 x 1” Pancake woodscrew on 18” centers maximum.)
5. Install the gable trim and face screw it to fascia board. This
fully secures the first panel to the
roof deck.
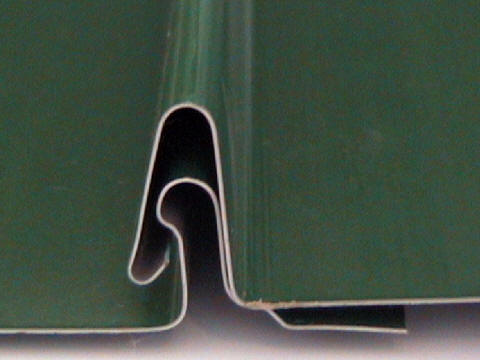
6. Position the second panel (overlap edge on top of the underlap
edge of first panel) assuring that the eave
edge is in position (1” overhang). Secure the second panel to the
first panel by applying slight pressure with
your foot on the overlap seam (or use rubber mallet) working from
the eave toward the ridge. The overlap
edge of the panel contains factory-applied sealant to ensure
weathertightness. Be sure that you
achieve a positive engagement between panels. Fasten the panel to
the roof deck.
7. Each consecutive panel will be applied as in step #4 and #5
above.

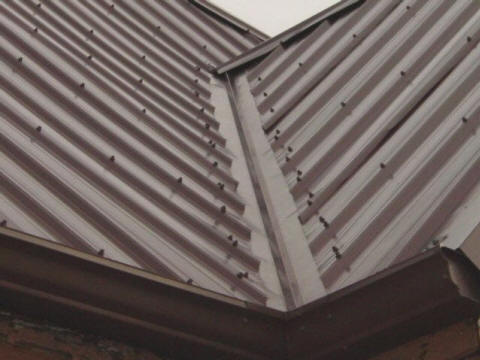
Installation Details for Standing Seam Metal Roofing
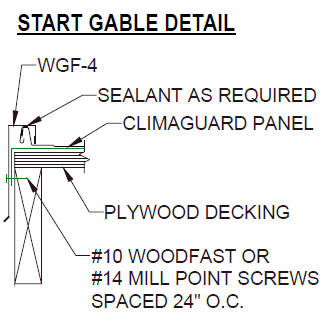
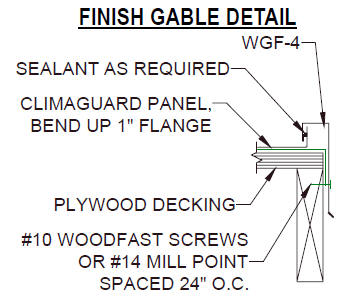
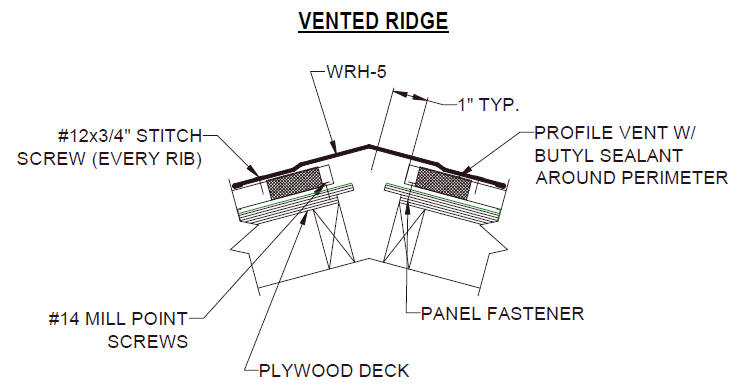
You should install gable flashing prior to the ridge. Plywood should be held back or cut back 1" from each side of the ridge if you are using a vented ridge setup.
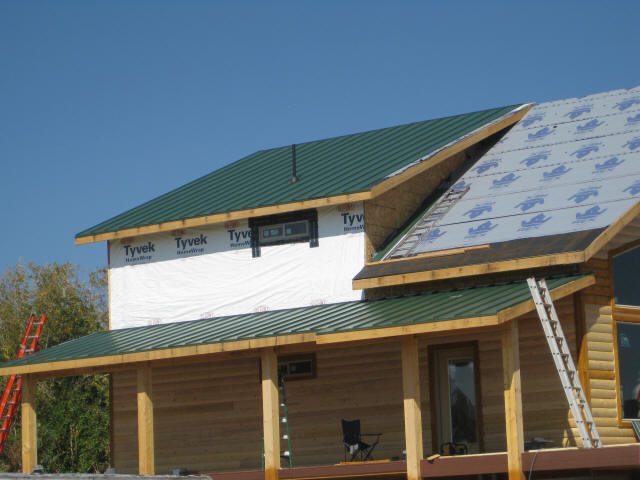
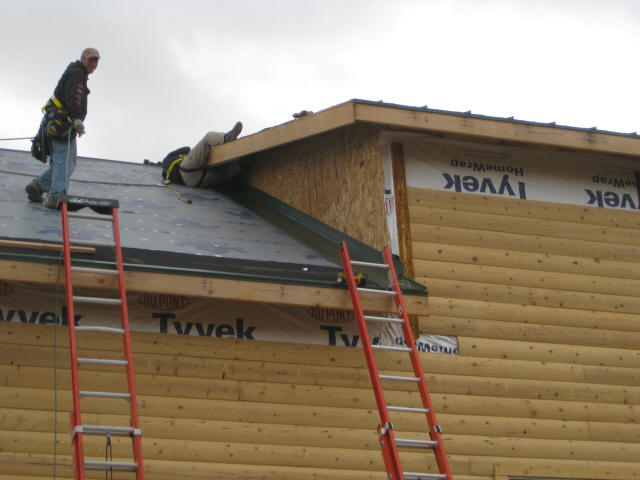
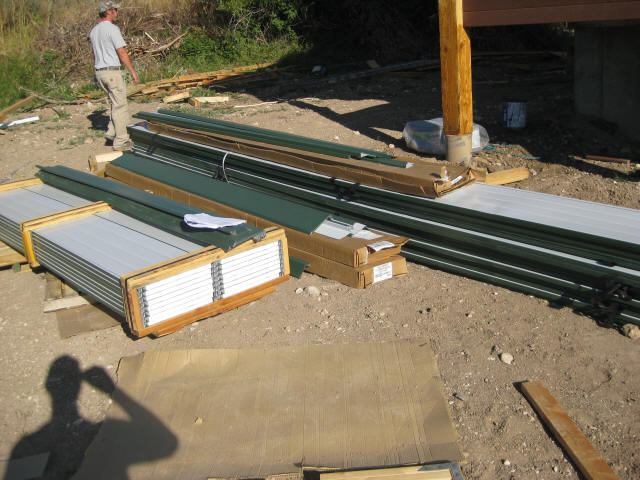
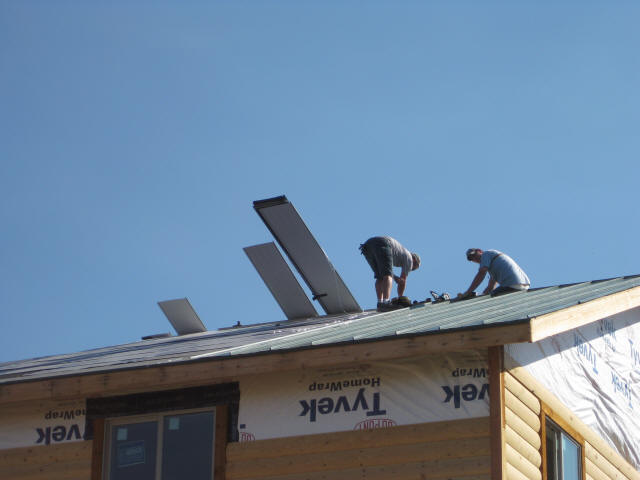
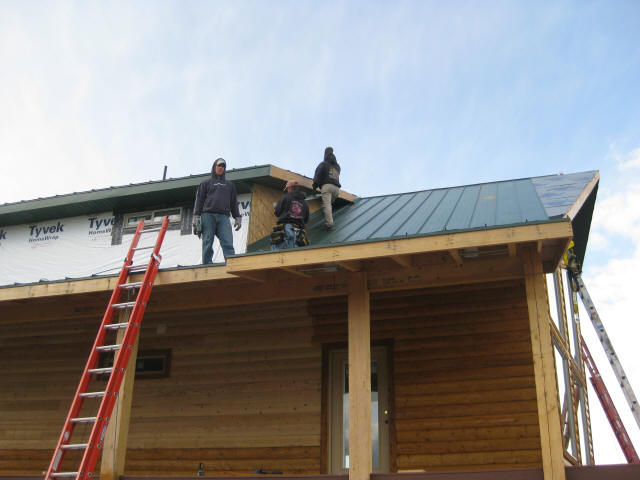
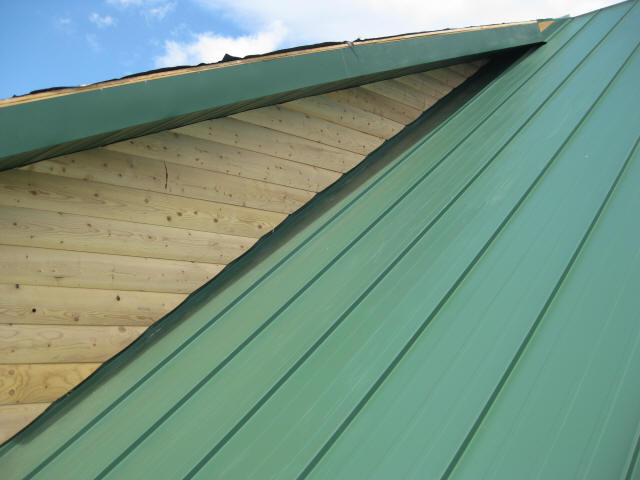
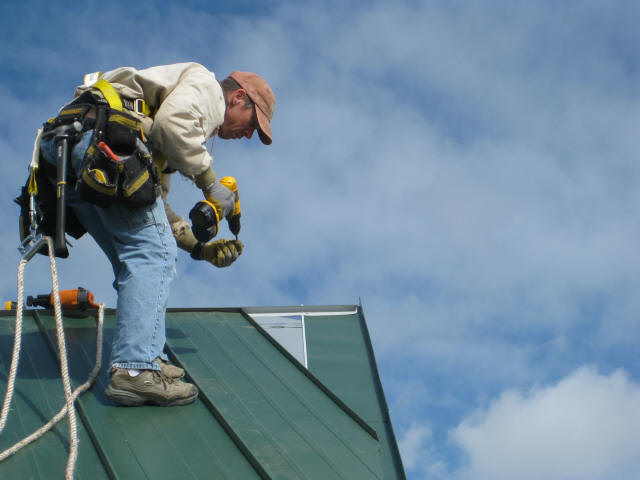
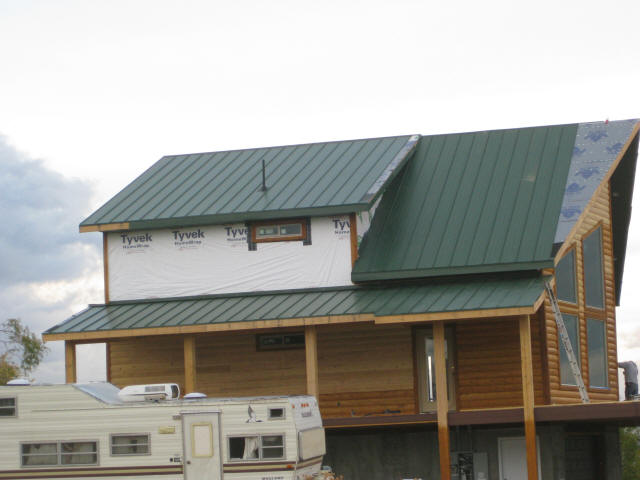
Pictures of our Cabin: Standing Seam Metal Roof Installation
Hopefully that give you the basics for installing a standing seam metal roof. I think it's easier than installing shingles but I'm sure others would argue differently.
Back to Top - Installing Standing Seam Metal Roof
Metal Roof Frequently Asked Questions
9 Reasons to Choose Steel Roofing
Factors that Go Into Metal Roof Prices