Building Stairs
Building stairs is another important, and somewhat technical, aspect of framing your own house. There are many ways to build stairs, including the unique rough-cut stairs we put in our cabin. This webpage will teach you the basics for designing and building a simple set of stairs.
The stairs from the main floor of our cabin to the upstairs loft are built of rough-cut timbers as shown below. All of the rough-cut timber for our project came from Jensen Lumber in Ovid, ID. These stairs are obviously not what you'd use for most construction projects but they worked well for the rustic theme of this cabin.
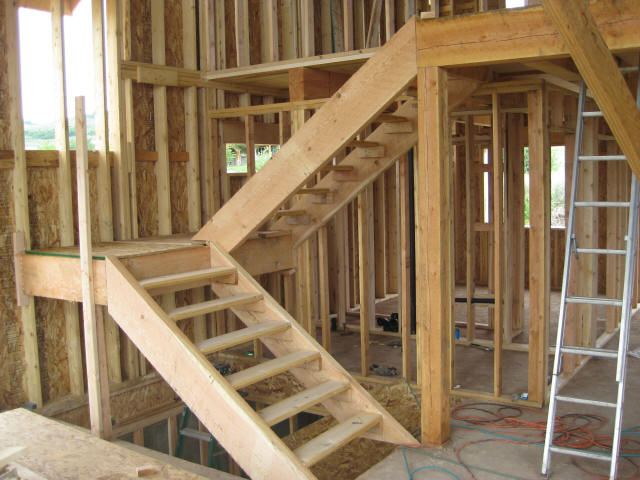
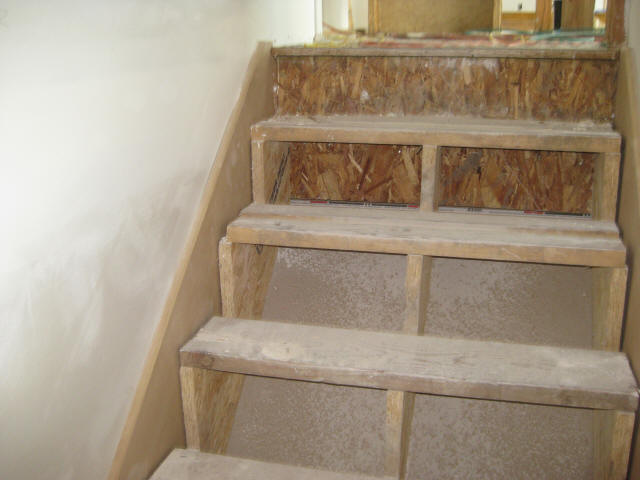
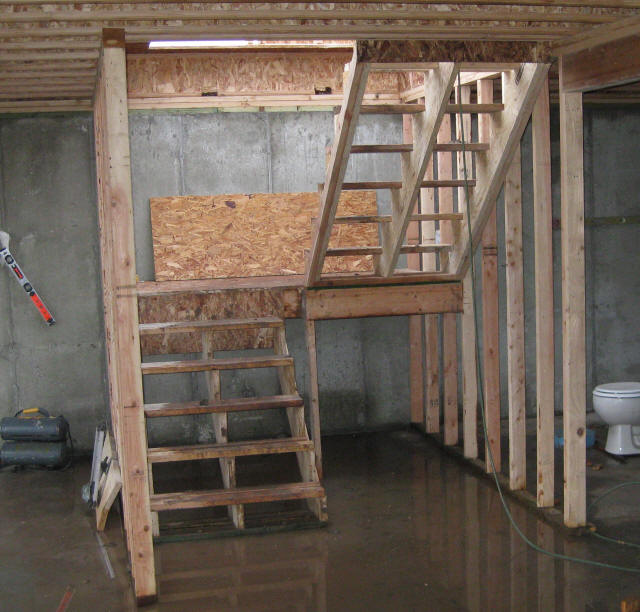
The stairs from the basement garage to the main floor are more typical. We used three stringers and some temporary treads as shown below.
Calculations for Building Stair Stringers
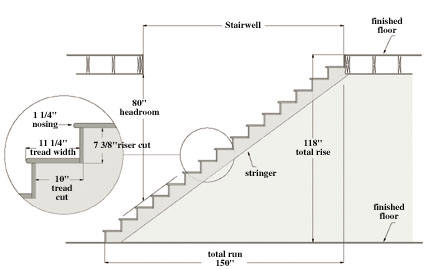
Most building codes specify a max riser height of 7 3/4" when building stairs. Recommended is 7 5/8". Tread runs should be no less than 10". Headroom throughout the stairway must be at least 6' 8" or 80". The first step in building your stair stringers is to determine how many stairs will be needed. Take your total rise (finished floor to finished floor) and divide by 7.5. The result will give you the number of risers. By taking your total rise and dividing by the number of risers you get the height of each riser. Here's an example -
118" (total rise) / 7.5 = 15.73 (round up to 16 risers)
118" (total rise) / 16 (risers) = 7 3/8" for each riser
The number of treads is just one less than the number of risers since you won't put a tread on the top of the last riser. With the above example this gives you 15 treads and at 10 inches each you'll have a total run of 150". Stair treads will usually have a nosing of maybe 1 1/4" giving a total tread width of 11 1/4". See the illustration below
Cutting the Stair Stringers
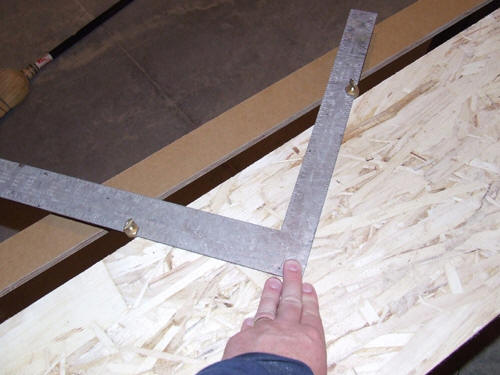
The most important tool you'll need is a framing square and brass stair gauge clamps as shown below. With this you can set a clamp at the riser height and another at the tread width and have a consistent way to mark out all the cuts. The material for your stringers could be 2 by 12s (as long as there are not many knots) or laminated strand lumber which you can see we used. The LSL's are great for stringers because the strands actually help prevent cracking at the intersecting cuts at the corner of the riser and tread.
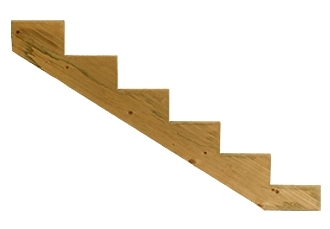
Once all the cuts are marked out you can cut with a circular saw and finish with a handsaw to make sure you don't overcut the intersection points which would weaken the stringer. Once you cut the first stringer out and do a quick fit check you can use it to mark out the two remaining stringers. Your stringer should look something like the picture below once it is cut out.
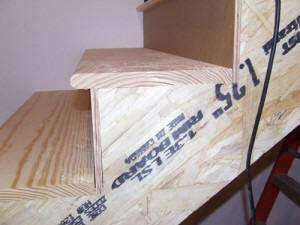
Installing Treads and Risers
The treads and risers can be made many types of wood. Some people recommend nailing the risers and screwing the treads to the stringers to prevent them squeaking. You should also glue the treads and risers to the stringers for the same reason. You can put a screw or two from the back side of each riser to the tread for added strength when building stairs. If the stringer runs along a wall you should also nail the stringer to the studs in that wall.
Stair-Building Terminology
Stair building is an art form with its own terminology. Here are some terms you may encounter when researching stair design:
-
Treads: Horizontal walking surface of the stair.
-
Riser: Vertical surface between two treads.
-
Carriage stringer: Support for the treads and risers; usually cut to have the treads sit on the horizontal plane and the risers nailed to a vertical cut.
-
Mop board/skirt board: Piece of lumber placed next to a carriage stringer and used to provide trim along a wall.
-
Wall rail: The grab bar along the pitch of the stair; usually mounted 34 inches off the leading edge of the tread. A wall rail should be 1 1/4 to 1 1/2 inch in diameter for ease of grip.
-
Handrail bracket: Metal piece of hardware that is used to mount the wall rail to the wall.
-
Handrail: Shaped wood member used in conjunction with posts and balusters to provide a safety barrier on an open balcony or open pitch section of the stair. This railing can also be wall mounted.
-
Post (newel): Vertical wood or support member at the landing or start of a stair. A post can be square or turned. A standard post diameter is 3½ inches.
-
Wall cap: Board used to decorate a half wall or used to mount balusters onto.
-
Balusters: Upright support of a handrail that prevents objects or people from going over the edge of a balcony or open side of a stair. Balusters are also referred to as spindles, pickets or turnings.
-
Headroom: Space from the leading edge of a tread to the header directly above. Six feet, 8 inches is a minimum guideline to follow.
-
Total rise: The dimension from one finished floor to the finished floor above.
-
Nosing: The overhanging lip of the tread. Standard nosing is 1 1/4 inches.
-
Tread depth: The cut dimension of the stringer; depth of the horizontal walking surface less the nosing dimension. Standard tread dept is 10 inches.
-
Riser height: The vertical dimension between two treads; this dimension must be equal throughout the total flight. Standard rise height is 7 5/8 inches and should not exceed 7 3/4 inches.
-
Total run: The length of all of the treads combined.