How to Build Shower Floor 1 (Pre-slope Layer)
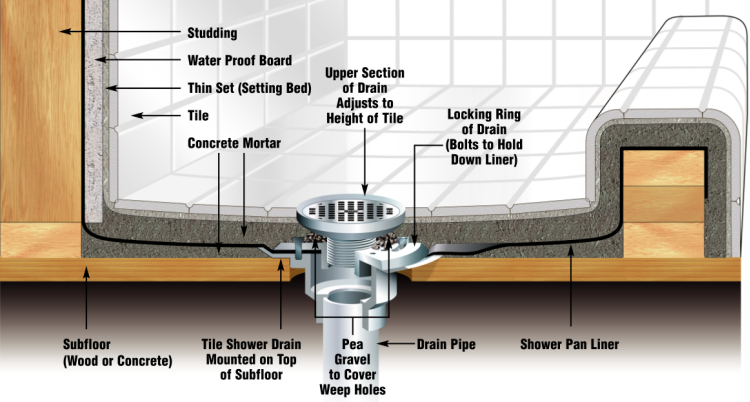
Building a shower floor pan correctly requires several steps. The diagram below illustrates the layers involved. It's key to have a pre-sloped layer of deck mud on the bottom. This deck mud should slope 1/4" for every foot from wall to drain. After that, the waterproof membrane or shower pan liner is installed and sandwiched in the locking ring of the drain. You then add a second layer of deck mud between the pan liner and tile. We'll go through this step by step below.
Building Shower Pan Curb
Building a curb for your shower is one of the first steps in creating a shower pan. The easiest method is to use three 2x4s stacked on top of each other. The first one is screwed into the floor, followed by the second and third. There is no need for pressured treated lumber, standard 2x4 lumber is all that's needed. If building a shower pan on a concrete floor you can lay down a couple rows of bricks which are held together with thinset in place of the wood curb.
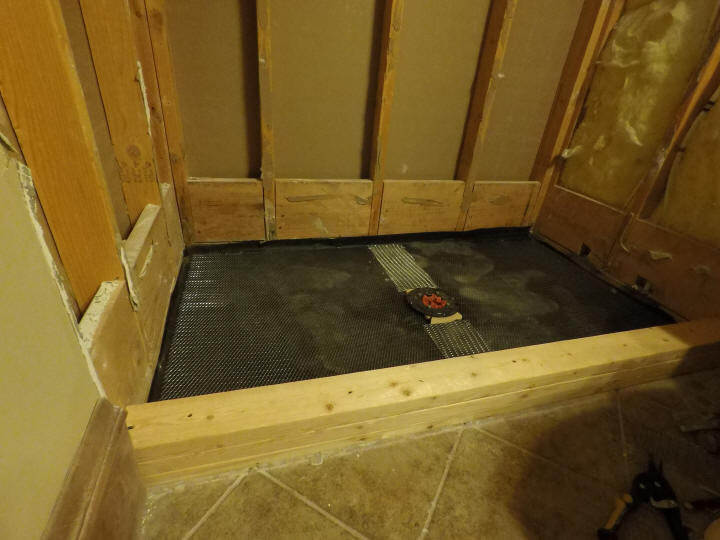
The picture above shows a shower pan curb constructed out of three 2x4s. The next step is to put down a layer of felt paper and then cover the floor with metal lathe as shown above. Cover the entire floor with the metal lathe, overlapping any seams. Staple the lathe to the floor. The metal lathe gives the pre-slope mud deck something to grab onto. The felt paper prevents the wood subfloor from wicking the moisture from the deck mud and causing it to dry too fast. When this happens the cement will not cure properly and it will weaken the pre-slope deck mud base.
Building Shower Pre-slope
This step is often ignored by contractors, experienced or not, but it is one of the most important steps in building a proper tile shower. Why is it ignored? Simple, it's extra time and effort. If you haven't noticed already, building a shower from scratch requires a lot of steps with time in between each. Pour mud, wait, liner, pour mud, wait, tile, wait, tile, wait, grout, wash, etc. Contractors will often skip the pre-slope step and just lay the liner flat on the floor. The shower won't leak and may seem perfectly fine for several years however without the liner being sloped to the drain water will collect under the shower tile floor and stagnate and eventually lead to mold and a smelly shower.
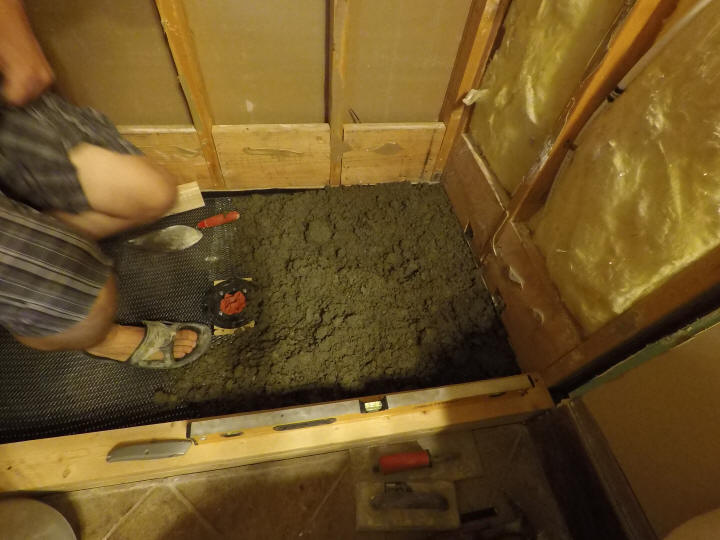
Dump a bucket or two of the deck mud in the shower pan.
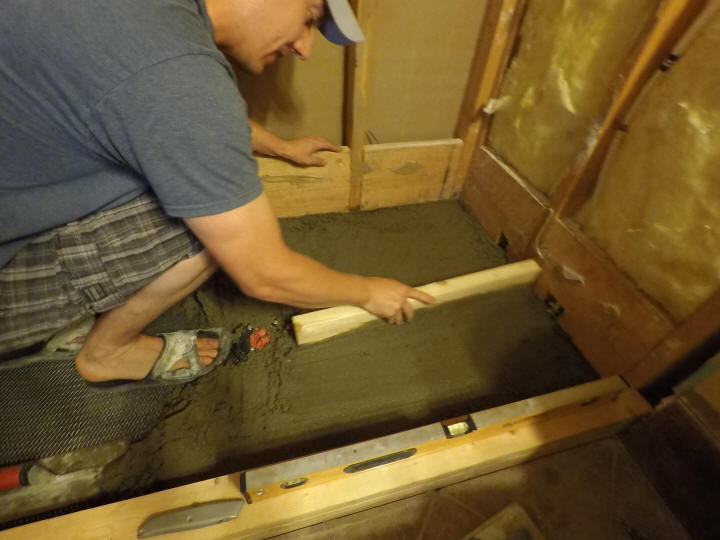
Use a 2x4 or trowel to smooth out the pre-slope floor. Remove the top flange of the drain (the part that connects with 4 bolts and sandwiches the shower liner). The deck mud should be flush or slightly higher than the top of the bottom flange of the drain. You should have 1/4" slope per foot between drain and wall. If your farthest distance from drain to wall is 3 feet you need 3/4" of drop and if you target 3/4" mud depth at the drain you will want to mark your wall at 1-1/2" and follow that as you float the floor. The bottom of your walls will usually have a base plate 2x4 which in this example works well for a mark to follow. You can level to the height of that 2x4 all the way around the shower. If your shower is not square, you still want to follow a level line around the perimeter of the shower even though this causes you to have a steeper slope where walls are closer to the drain. This will provide a level base to start your wall tile.
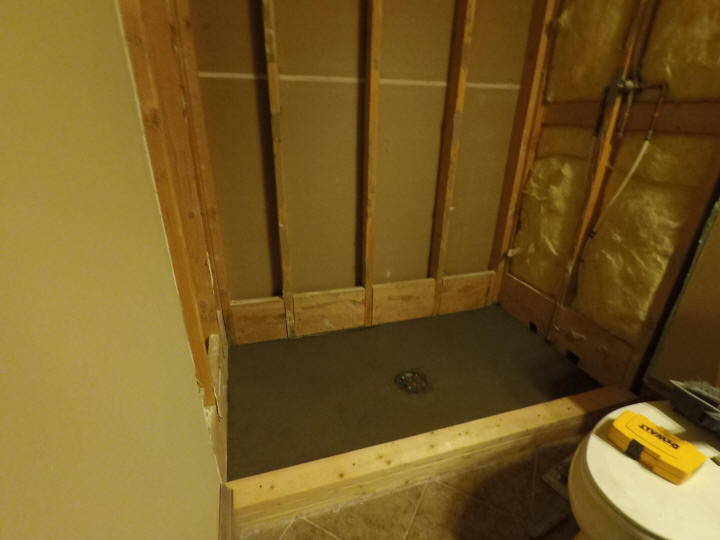
The completed pre-slope shower with deck mud (dry pack mortar) is shown above. Remember to pack the deck mud with a 2x4 or heavy trowel as you go. Don't stress about getting this step perfect. As long as there aren't major humps or dips between wall and drain all the way around you'll be fine. There are several additional layers to the shower floor to cover up imperfections.
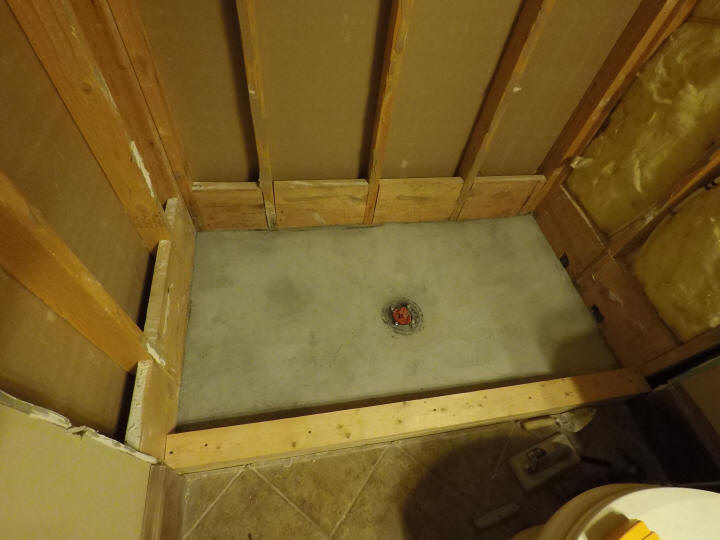
Pre-slope shower floor after having dried for several days is shown above. You should wait at least 24hrs for the deck mud to dry.
Step 2: How to Replace a Shower Drain
Step 3: How to Make Shower Deck Mud
Step 4: How to Build a Shower Floor 1 (Curb and Pre-slope)
Step 5: How to Build a Shower Floor 2 (Liner, Drain, Final Slope)
Step 6: How to Install Shower Backerboard
Step 7: How to Build a Waterproof Shower Bench
Step 8: How to Tile Shower Floor
Step 9: How to Tile and Grout Shower Walls